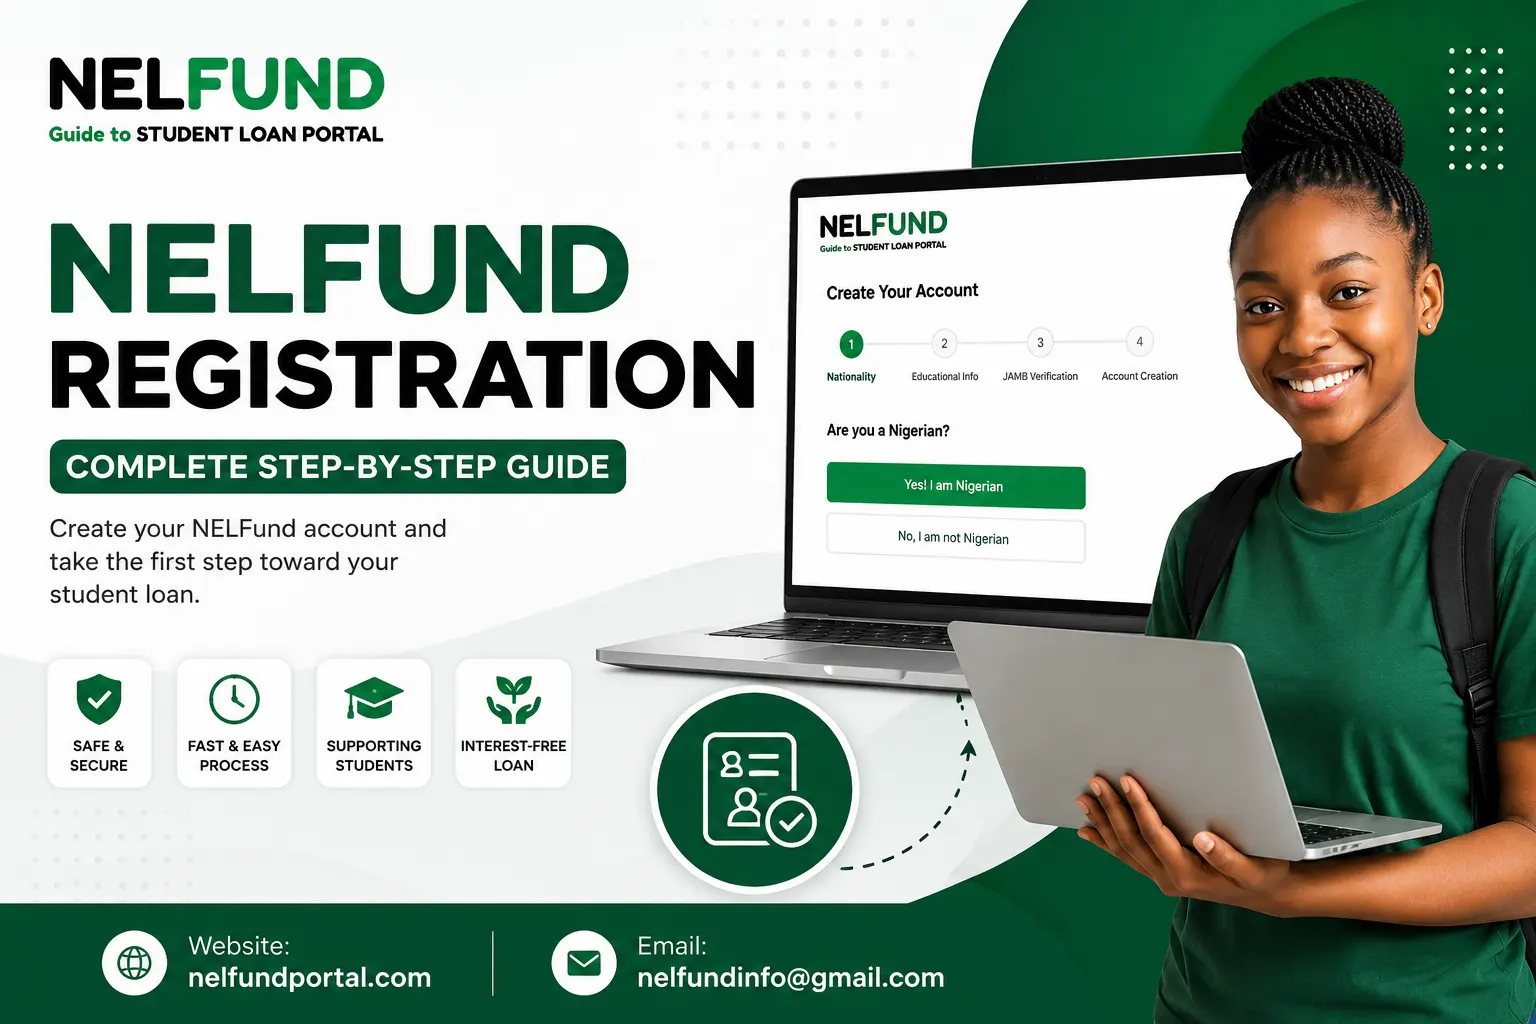
NELFund Registration 2026 – Create Student Loan Portal Account
Want to create your NELFund Portal account but don’t know how to register? Many students get confused during the NELFund registration process. Some don’t know the requirements, while others don’t know the difference between registration and the loan application. A small mistake during registration can also delay the next steps.
Here we guide the complete process in simple steps. You’ll learn who can register, what you need before creating an account, how to register successfully, common registration problems, practical tips to solve them and what to do after registration..
What Is NELFund Registration?
NELFund registration is the process of creating an account on the official NELFund Student Loan portal. Every student must register before applying for a student loan. Once your account is created, you can:
NELFund Registration vs. NELFund Loan Application
Many students think registration and loan application are the same process. Both are completely two different steps. In Registration you create your account on the NELFund student loan portal.
After this you complete your student profile, and submit your loan application. In this step you apply for financial support from NELFund.
In simple words, you must register first before you can apply for a student loan.
|
NELFund Registration |
Loan Application |
|
Creates your account |
Requests a student loan |
|
Done only once |
Submitted after registration |
|
Gives access to your dashboard |
Starts the loan review process |
|
Requires basic personal information |
Requires academic and bank information |
Remember: Creating a NELFund account does not mean you have applied for a loan. After registration, you still need to log in, complete your profile, and submit your loan application.
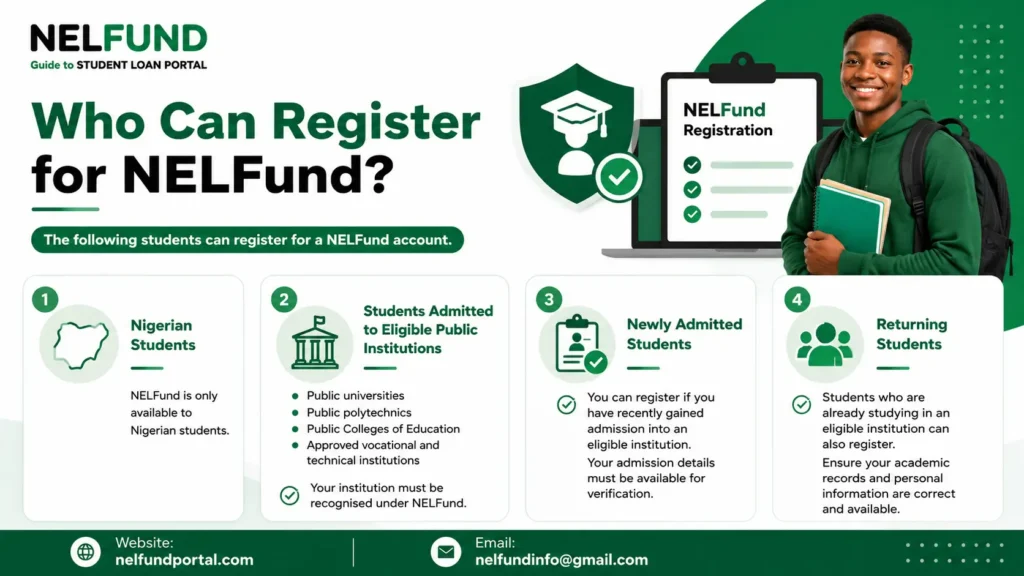
Who Can Register for NELFund?
Not every student can register on the NELFund student loan portal. Before creating an account, make sure you meet the basic eligibility requirements. The following students can register for a NELFund account.
Nigerian Students
NELFund is only available to Nigerian students. During registration, you will be asked to confirm that you are a Nigerian before you can continue with the account creation process.
Students Admitted to Eligible Public Institutions
You can register if you have been admitted into an approved public tertiary institution in Nigeria.
Eligible institutions include:
Your institution must be recognised under the NELFund scheme.
Newly Admitted Students
If you have recently gained admission into an eligible institution, you can create a NELFund account. Your admission details must be available for verification.
Returning Students
Students who are already studying in an eligible institution can also register. Make sure your academic records and personal information are correct and available.
Requirements for NELFund Registration
Before you register, make sure you have the required information. You will need:
These details are used to verify your identity and student status during registration.
|
Requirement |
Can You Register Without It? |
|
National Identification Number (NIN) |
No |
|
Bank Verification Number (BVN) |
No |
|
JAMB Registration Number |
No |
|
Admission Information |
No |
|
Admission Letter |
No |
|
Institution Details |
No |
|
Valid Email Address |
No |
|
Phone Number |
No |
|
School Email Address |
Yes (you can use a personal email address) |
Who Cannot Register?
You may not be able to register if:
How to Register for NELFund?
The NELFund registration process is simple. If you have all the required information ready, you can complete it in just a few minutes by following these simple steps.
Step 1: Visit the Official NELFund Portal
Open your web browser and visit the official NELFund Student Loan Portal. Once the homepage opens, you are ready to begin the registration process.
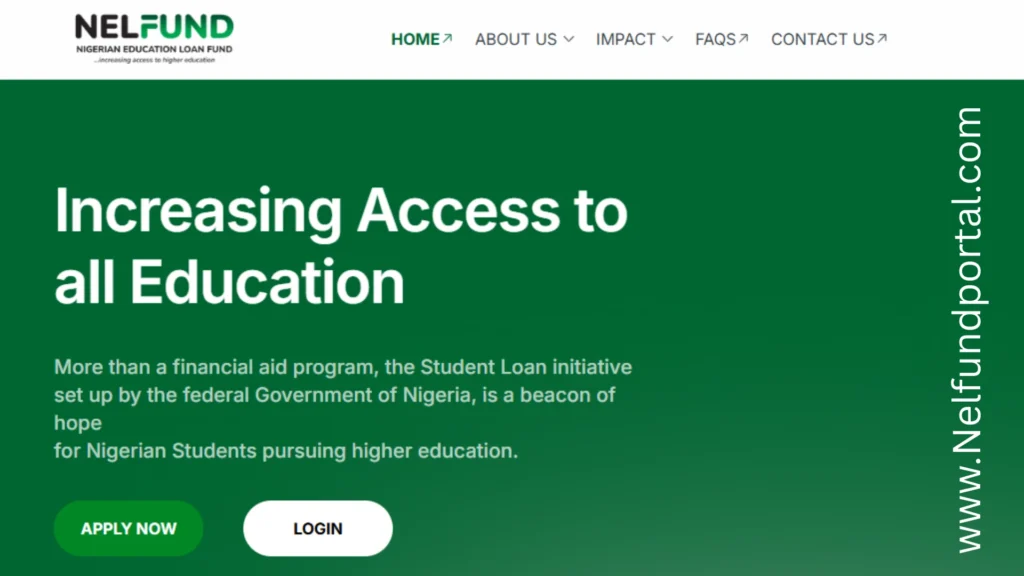
Step 2: Click the “APPLY NOW” Button
On the homepage, locate the “APPLY NOW” button.
If the page takes a few seconds to load, wait for it to finish before clicking again.

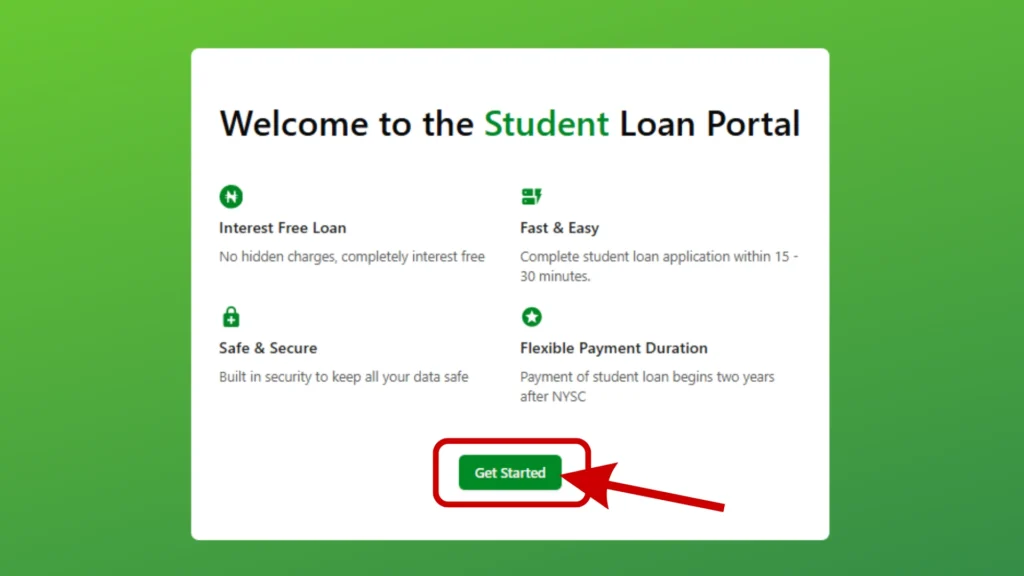
Step 3: Read the Student Loan Portal Welcome Page
After clicking “APPLY NOW,” you will be taken to the Welcome to the Student Loan Portal page.
You will see benefits such as:

Step 4: Click “Get Started”
To continue, click the “Get Started” button.
Step 5: Confirm Your Nationality
The portal will ask a simple question:
“Are you a Nigerian?”
You are Nigerian so select “Yes! I am Nigerian” to continue.
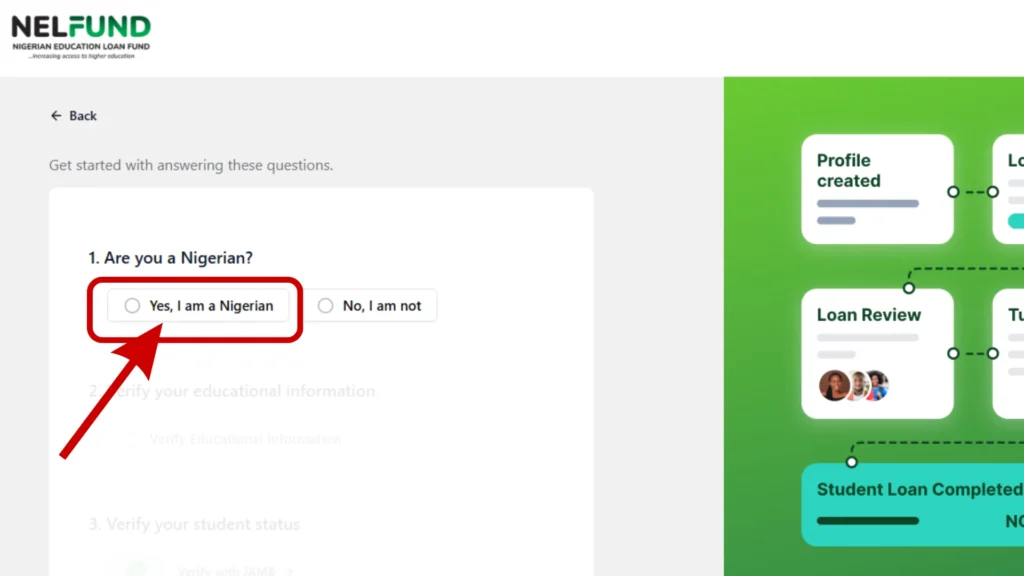
If you select another option, you will not be able to proceed with the registration.
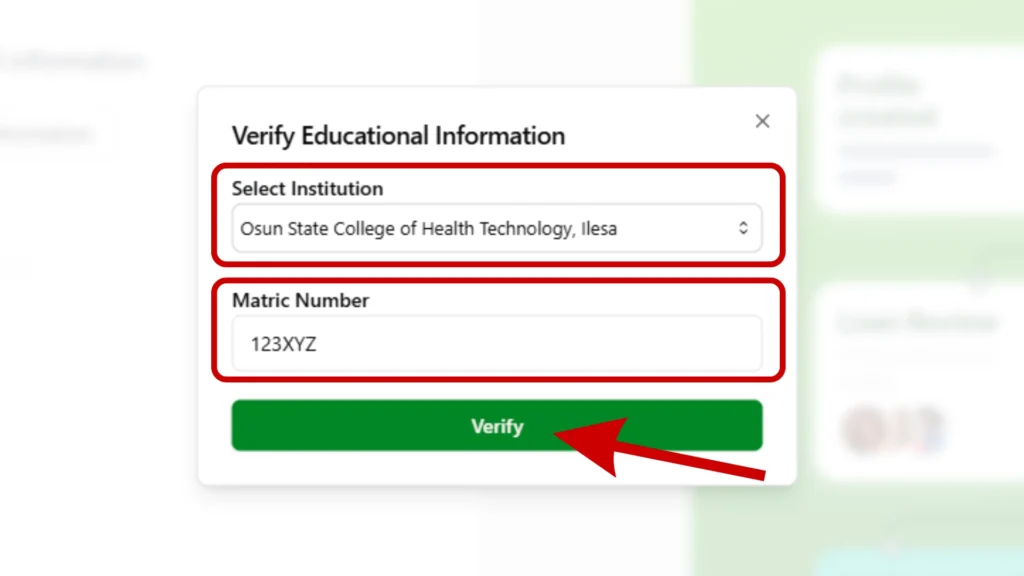
Step 6: Verify Your Educational Information
First, select your institution from the list provided on the portal. After selecting your school, enter your Matric Number in the required field.
Before clicking “Continue,” check that both your institution and matric number are correct.
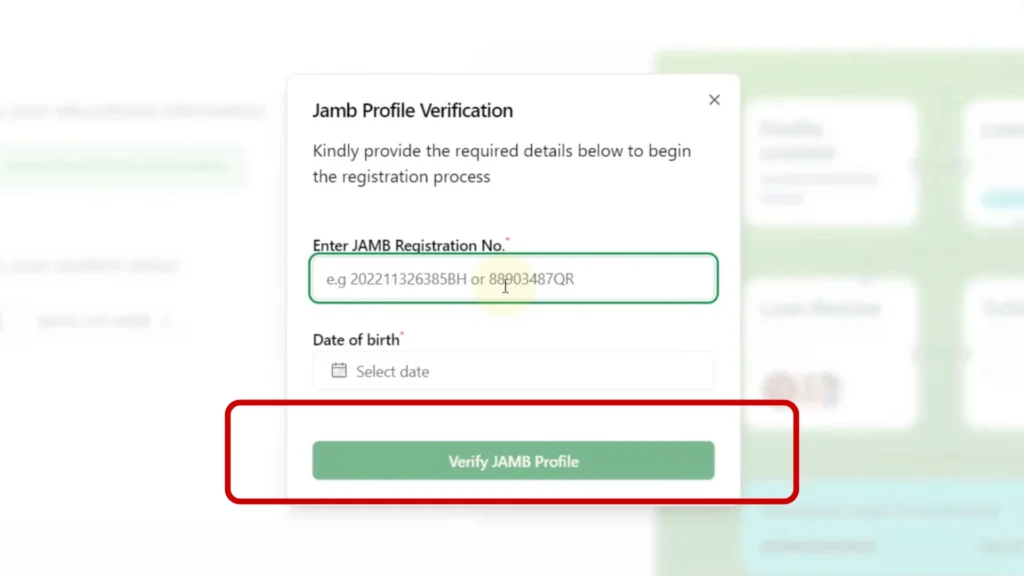
Step 7: Verify Your Student Status
The next verification is completed using your JAMB information. Enter:
After entering the correct information, click “Verify your JAMB Number.”
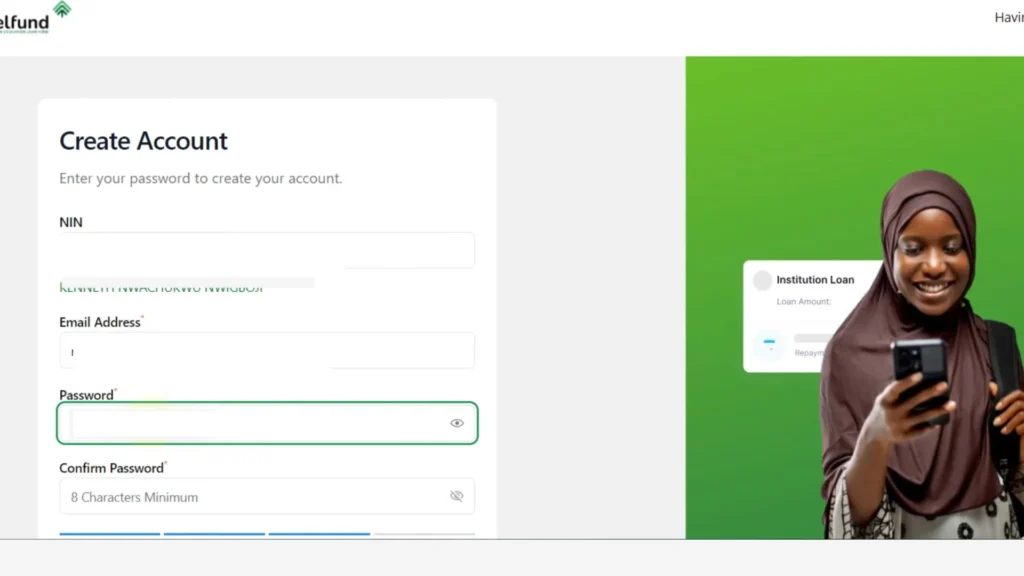
Step 8: Create Your Account
You are now on the final registration page. Complete the NELFund account creation form by entering the following details:
Before clicking “Create Account,” review all the information you entered.
Step 9: Verify Your Email Address
After creating your account, NELFund will send a verification email to the address you provided. Click the verification link to activate your account.
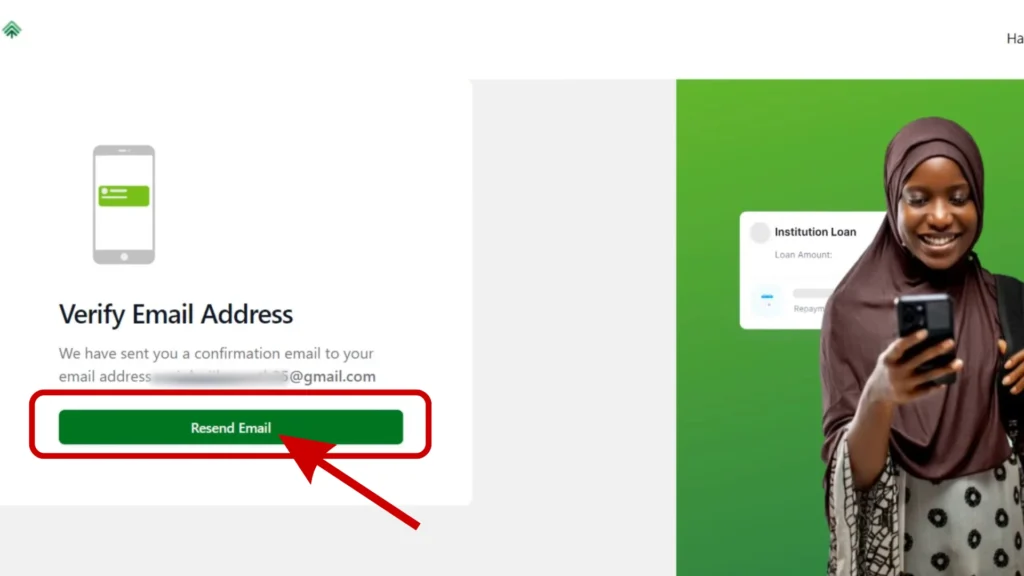
Once this step is complete, your NELFund account has been successfully created.
Step 10: Log In to the Portal
After verifying your email, return to the NELFund portal.
Click “Login” and enter:
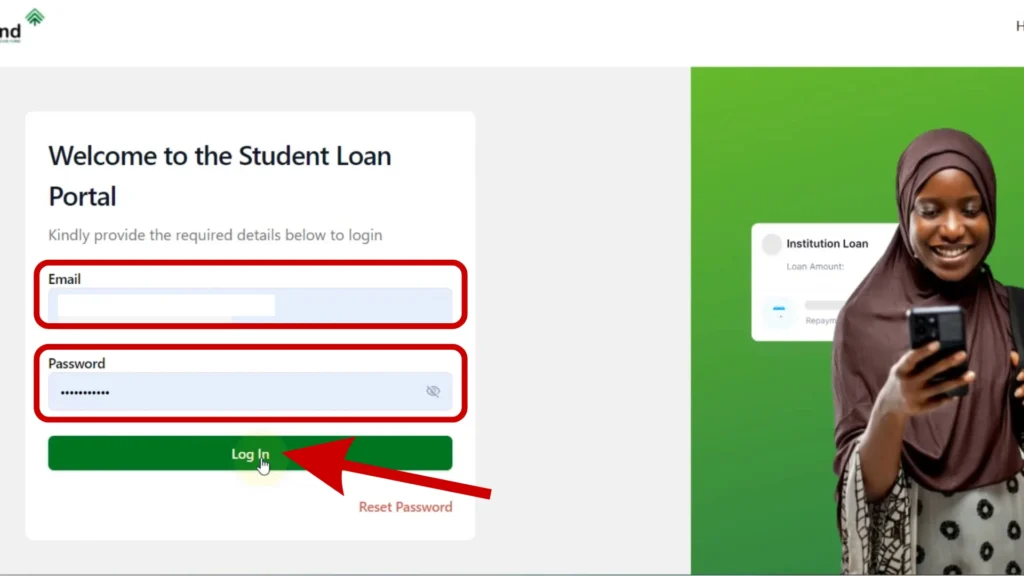
After signing in, you will be taken to your student dashboard.
What After NELFund Registration?
Creating your NELFund account is only the first step. After NELFund registration, log in to complete your student profile, submit your loan application, track your application status, and receive important updates from NELFund. Completing these steps correctly will help you to get a NELFund student loan successfully.
Common Registration Problems and Solutions
Most students complete registration without any problems. However, if you experience some common issues. Here are some simple solutions.
Email Verification Not Received
If you do not receive the verification email:
Do not create another account unless necessary.
BVN Verification Failed
If your BVN cannot be verified:
JAMB Details Not Found
If your JAMB information cannot be verified:
Account Already Exists
This message usually means you have already registered. Do not create another account:
Portal Is Slow or Unavailable
During peak registration periods, the portal may become slow.
If this happens:
NELFund Registration Tips
A few simple tips can help you complete your registration smoothly.
Taking a few extra minutes now can help you avoid problems later.

Conclusion
NELFund registration is the first step to getting a student loan. Once you create your account, you can log in, complete your profile, and submit your loan application. Before you register, make sure you have all the required information and enter every detail correctly.
After registration, complete your profile and submit your application as soon as possible. You should also check your dashboard regularly for updates. Following the correct registration process will help you move smoothly to the next stage of your NELFund application.